What Is a DNS Leak and Why Does It Matter
When you connect to the internet through a VPN or proxy, your traffic is supposed to be routed through that secure tunnel. A DNS leak is when some of your domain name requests slip out of that tunnel and go to your internet service provider or another third-party resolver instead. That means the sites you visit may be visible to someone other than your VPN or proxy provider. Running a DNS leak test is the clearest way to find out whether your setup is exposing your browsing activity.
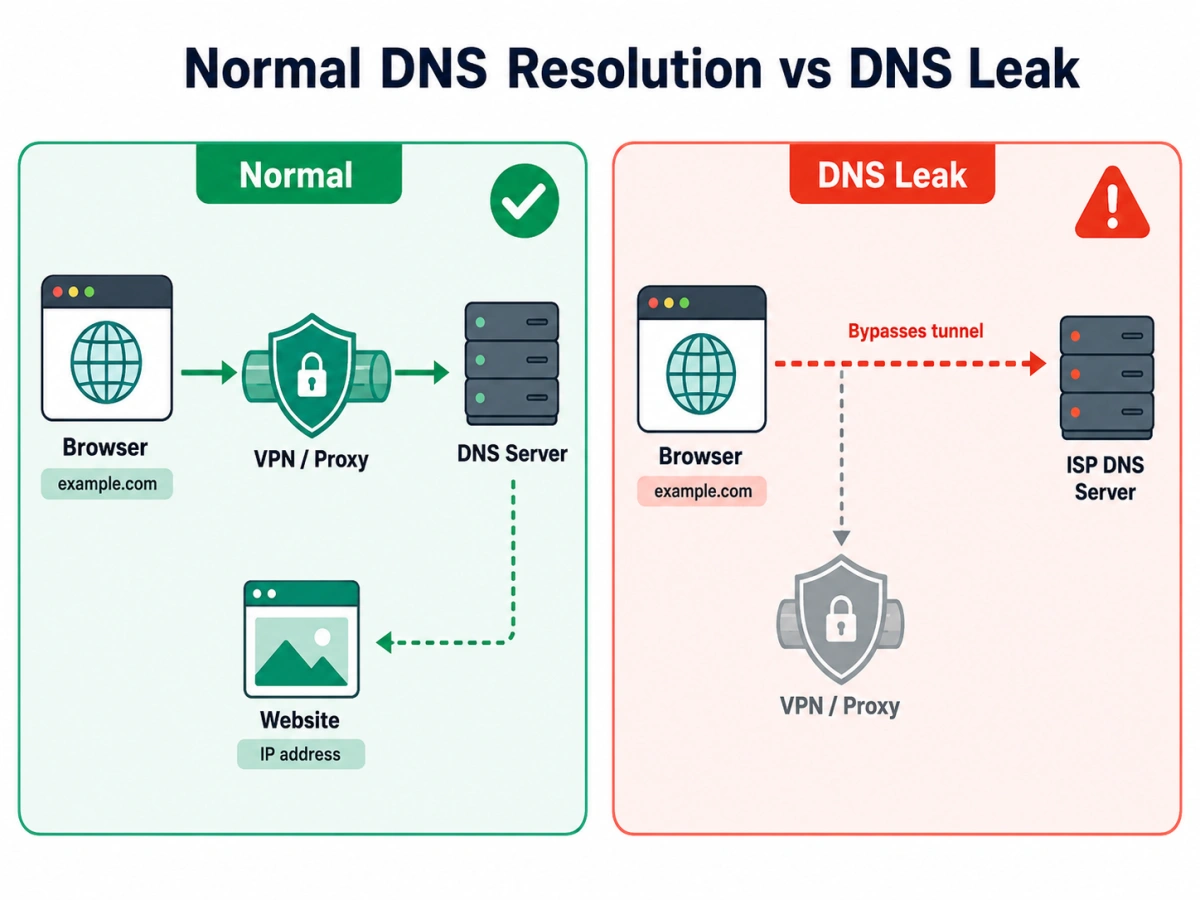
How DNS requests normally work
Every time you type a domain like shopify.com, your device needs to translate it into an IP address. It sends a DNS query to the resolver configured on your system. In a normal setup, that resolver belongs to your VPN provider or proxy provider, so your ISP never sees which domains you look up. The response comes back, and your browser connects to the site through the tunnel.
What happens when a leak occurs
A leak happens when some of those DNS queries are sent outside the tunnel. For example, your browser might use the system DNS resolver for certain subdomains, or an app on your device might bypass the tunnel entirely. The result is that your ISP or a public DNS server, not your VPN or proxy, learns which sites you visit.
Why VPN and proxy users should care
If you use a VPN to hide your IP, a DNS leak breaks that promise. Your browsing history can be logged by your ISP. For people who manage multiple accounts, the problem is worse. A DNS leak can tie your accounts to a DNS server or IP that does not match your proxy location. That inconsistent signal is one of the factors platforms use to flag accounts as suspicious. In short, a leak can weaken the very isolation you set up.
How to Run a DNS Leak Test
Testing is quick and does not require special software. You open a test site in your browser, and the site sends your device a unique domain name to resolve. It then checks which DNS server actually received that query.
1.Using browser-based test tools
The most common way to run a DNS leak test is through a website such as dnsleaktest.com, browserleaks.com/dns, or ipleak.net. These sites all work similarly: they display the DNS servers your connection is using. If you see your VPN or proxy provider’s DNS servers, the setup is fine. If you see your ISP’s servers, you have a leak.
2.Recommended online DNS leak test sites
A quick list you can try today:
- dnsleaktest.com – shows a summary and details of the DNS servers your device contacted.
- browserleaks.com/dns – also checks IPv6 and provides a clean result page.
- ipleak.net – combines DNS, IP, and WebRTC leak checks in one place.
Any of these will give you a reliable answer. Run two different tools to confirm the result, because occasional false positives are possible.
How to read the test results
Look at the country and organization of the DNS servers shown.
If the servers belong to your ISP or are located in your physical region, the DNS requests are leaving the tunnel.
If they belong to your VPN or proxy provider, the tunnel is working as intended. Also check whether more than one resolver appears. In a clean setup, only the resolver tied to your VPN or proxy should be used.
DNS Leak vs WebRTC Leak: Key Differences
DNS leaks and WebRTC leaks are often confused, but they expose different types of data. The simplest difference is that a WebRTC leak can expose your real IP address, while a DNS leak can expose the domains you visit. Both can reveal your real identity, so it is important to test for both.
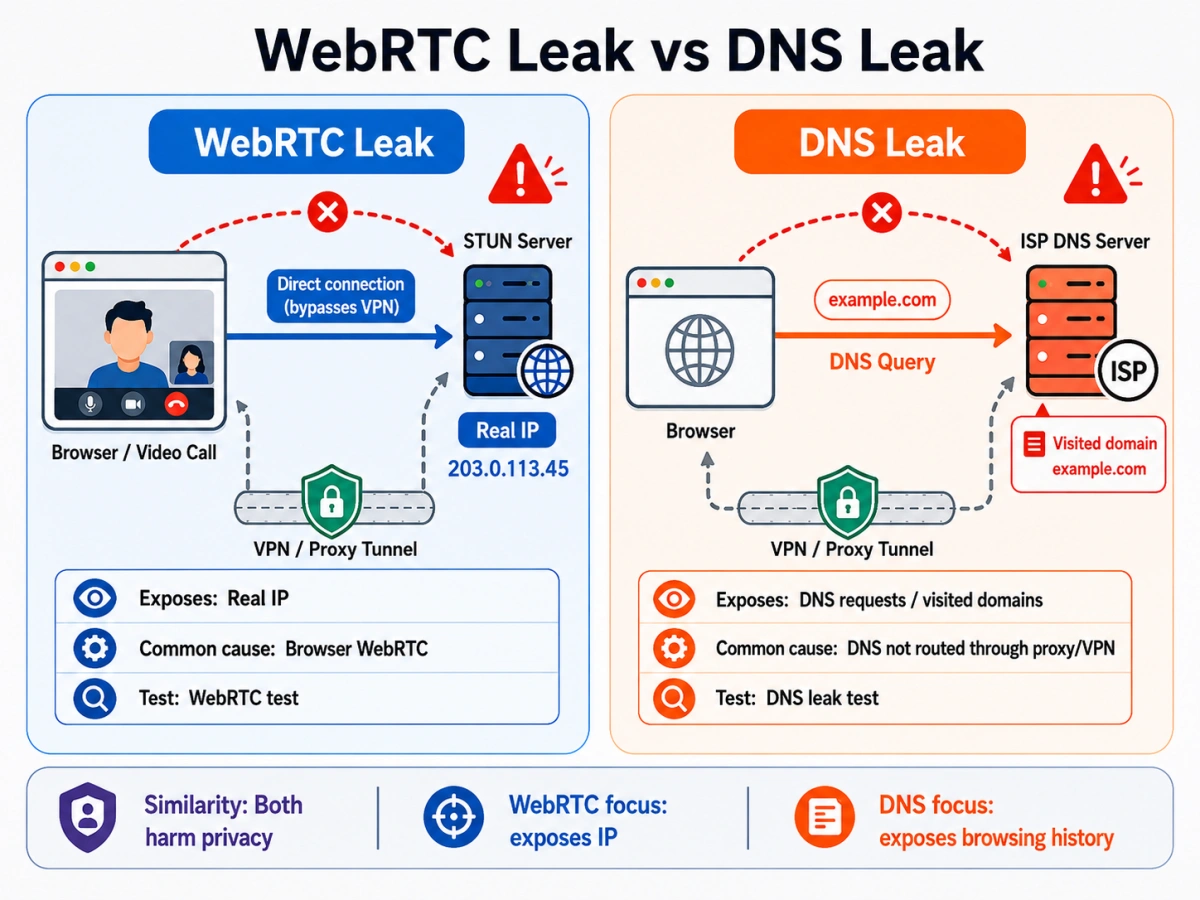
WebRTC and STUN explained
WebRTC is a browser feature that powers video calls and peer-to-peer connections. To establish a connection, it uses STUN servers to discover your public IP address. Instead of routing through your VPN or proxy, WebRTC can communicate directly with those STUN servers. That direct communication bypasses the tunnel and can expose your real IP address.
How to identify a WebRTC leak
You can check for a WebRTC leak at browserleaks.com/webrtc or ipleak.net. If the test shows your actual public IP address—the one your ISP assigned to you—then WebRTC is leaking. If it shows your VPN or proxy IP, WebRTC is using the tunnel correctly.
Disabling WebRTC in popular browsers
Since WebRTC is enabled by default in most browsers, you should disable it if you need strict IP privacy.
- Firefox: Type about:config in the address bar, search for media.peerconnection.enabled, and set it to flase

- Chrome and Edge: There is no built-in toggle, so use an extension like WebRTC Leak Prevent or WebRTC Control.
- Brave: WebRTC is disabled by default in its strict fingerprinting mode.
Keep in mind that disabling WebRTC will break video calls and some chat features. If you need those, try a browser-based solution that routes WebRTC through the proxy instead of disabling it entirely.
Common Causes of DNS Leaks
Understanding why leaks happen helps you fix them at the source. The cause is often the operating system or a small configuration mistake, not the VPN or proxy product itself.
Windows DNS behavior and svchost.exe
Windows runs a DNS Client service through svchost.exe. This service caches DNS responses and is designed to send queries to multiple DNS servers to increase reliability.
When you connect to a VPN, that behavior can cause some queries to go to your ISP’s DNS server, especially if the VPN does not lock down all DNS paths.
If you work on Windows, test on a macOS or Linux device as well to see whether the leak is specific to Windows. A simple workaround is to disable the DNS Client service, but that also slows down domain resolution.
VPN and proxy configuration mistakes
Many people configure a proxy in their browser but forget that DNS was already resolved at the system level. For example, a SOCKS5 proxy does not carry DNS traffic by default. If the browser resolves the domain through the system resolver before connecting, the DNS query is sent to your ISP.
In a proxy setup, you need to either use a proxy that supports DNS filtering or configure the application to use the proxy for DNS as well.
In anti-detect browsers, you want the proxy and the DNS settings to be dynamic and tied to the same session.
If you would rather avoid manual DNS configuration, you can use a Built-in Proxy Overview, which manages the proxy and related settings for each profile.
Router and network-level issues
Even with a VPN running on your computer, some routers use their own DNS settings. If your device uses a router that redirects DNS queries, those queries may never reach your VPN’s resolver.
IPv6 can also cause leaks, because many VPNs only tunnel IPv4 traffic. If your network uses IPv6 and the VPN does not handle it, DNS over IPv6 will bypass the tunnel. Disable IPv6 on the network adapter or use a VPN that supports IPv6.
How to Fix and Prevent DNS Leaks
Once you know what a leak is and what causes it, fixing it is usually straightforward. The key is to make sure all DNS traffic stays inside the tunnel, no matter which app or operating system feature tries to send it elsewhere.
Use reliable DNS servers
Choose a trustworthy resolver and configure it system-wide. Cloudflare (1.1.1.1), Google (8.8.8.8), and Quad9 (9.9.9.9) are common options. If your proxy provider offers its own DNS servers, use those, because they match the geolocation of your proxy IP. After changing your DNS, run a DNS leak test again.
Configure VPN or proxy correctly
For VPN users: enable the kill switch or “block non-VPN traffic” option in your VPN client. This prevents any traffic from leaving the tunnel if the VPN drops.
For proxy users: use a proxy that routes DNS through the same connection. If you set a proxy manually in an anti-detect browser, pair it with the proxy provider’s DNS servers. A built-in proxy system can remove this manual step because the browser and the proxy are managed together.
DNS Leak Protection for Multi-Account Users
When you run multiple accounts, isolation is everything. A DNS leak can connect two accounts to the same resolver or IP, which may trigger security filters. That is where anti-detect browsers come in.
How anti-detect browsers reduce leak risk
Anti-detect browsers like FlashID isolate each account in a separate browser profile. Each profile can have its own proxy, and the browser routes DNS queries through that proxy’s connection. Since the DNS response matches the proxy’s location, your traffic looks more consistent to the platform you are using.
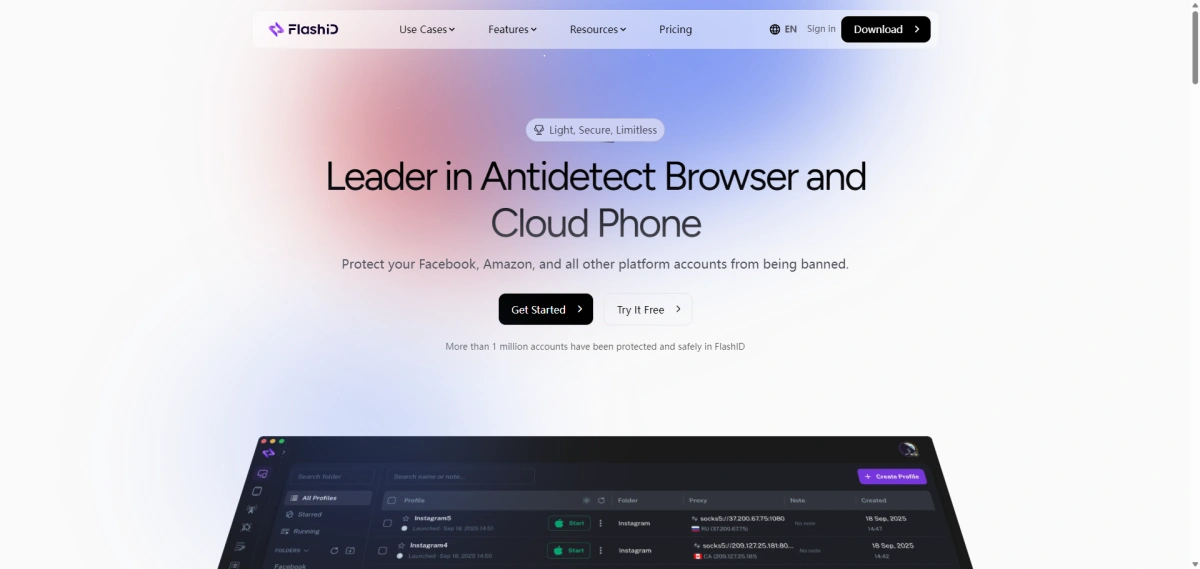
FlashID’s built-in proxy and fingerprint isolation
FlashID includes built-in proxy purchasing and management, so you don’t have to manually set DNS values for every profile.
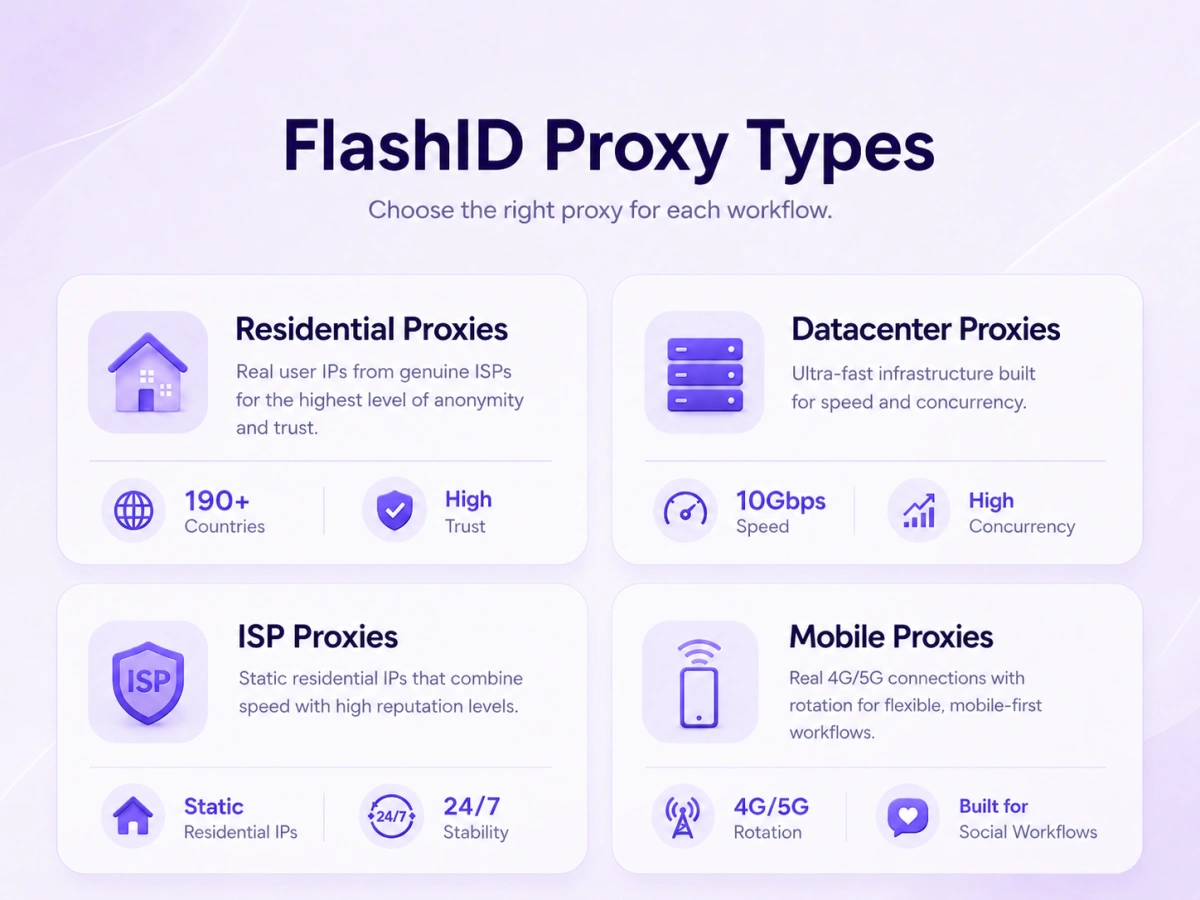
It supports static and rotating IPs in 20+ countries, and each profile gets a unique digital fingerprint. This combination reduces the chance of a manual proxy configuration mistake that causes a DNS leak. However, no tool can guarantee 100% leak-free status, and you should always verify each profile before running real accounts.
FAQ
1.What are DNS leaks?
A DNS leak is when your device sends DNS queries outside your VPN or proxy tunnel, allowing your ISP or another third party to see the domains you visit.
2.What are WebRTC leaks?
A WebRTC leak is when the WebRTC feature in your browser sends traffic directly to STUN servers, revealing your real IP address even when you are using a VPN or proxy.
3.Should I be worried about a DNS leak?
It depends on what you are doing. If you are just browsing casually, a DNS leak may not be a big deal. If you rely on a VPN or proxy for privacy, or you manage multiple accounts, you should care because it exposes your activity and can break account isolation.
4.How do I know if my DNS is leaking?
Run a DNS leak test from a website like dnsleaktest.com or browserleaks.com/dns. If the test shows your ISP’s DNS servers, your DNS is leaking.
5.Can a proxy cause DNS leaks?
Yes. A SOCKS5 proxy, for example, does not route DNS traffic by default. If your browser resolves the domain before connecting to the proxy, the DNS query goes to your ISP or local resolver.
You May Also Like